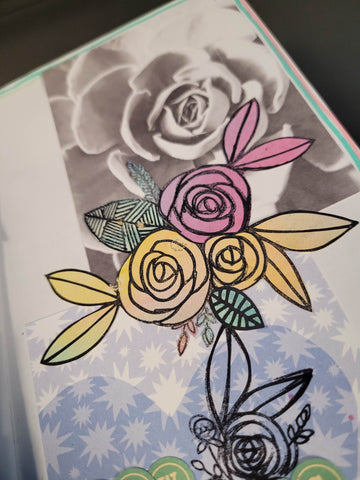
Hello! Jenn here with a new Traveler's Notebook layout featuring the Floral Stamp Set and some Focus on You journalling cards from my stash. My Traveler's Notebook is almost full so I wanted to make sure I kept the dimension for this layout to a minimum. I thought it would be fun to bring the interest into this layout by creating my own embellishments to fussy cut out.

I started with some plain white cardstock and five colours of Tim Holtz Distress Oxides. I smooshed the oxides onto the paper and sprayed the paper with water to help the colours to run and blend together. This is a favourite technique of mine and I always love the results! Don't be nervous about how things look in the beginning, they always work out in the end. I recommend starting with two or three colours that you know will blend together nicely, like blues, greens, and yellows, or reds, pinks, and purples. Let those colours dry a little bit and then add any other colours you want, that may not blend as nicely, like adding green to your warm colours or orange to your cool colours. That will help to ensure that your contrasting colours don't blend enough to give you muddy colours. Make sure you add enough water that all your edges soften and lift your paper to move the water around and let it pick up colours and blend them. You can add you shimmery mists while your colours are still wet which will blend some of that shimmer around, or leave your paper to dry and then add the shimmery splatters. I did a little of both :) Now leave everything to dry really well before stamping your images all over the paper, in the different colour combos you've created. All you have left to do is clean your stamps well to get the shimmer off of them, and then fussy cut your images. Gorgeous!!!


While me embellishments dried, I simply added two journalling cards, offset, to each page of my Traveler's Notebook layout and then added my pictures on top, on the left page. I used a water brush and the oxides I used for the embellishments, to create a little border around the edge of the entire layout. I really like using the oxides for this because they sit on top of the paper a little better, rather than soaking into the paper like other inks. This means that they don't bleed through the pages of your Traveler's Notebook quite as much. I just smooshed the lid down onto the ink pad and the use a damp, but not completely wet, brush to pick up the colour from the inside of the lid, and draw a sketchy line around the edge of the page. I also splattered a little bit of colour onto two corners of the layout, and stamped a little rose on other side as well. Finally I added my title, New Glasses, and then I was ready to fussy cut and add my embellishments.


I fussy cut the florals that I wanted for my layout, and arranged them onto the page in 3 little clusters, and then tucked the rest of the fussy cut florals and hearts into an Iris container to use for another time. It's so easy to fill your page with mixed media, and stamp the entire page to fussy cut a bunch of embellishments at once, a great time saving tip! To finish the layout, I added some journalling about the new glasses, and thats it!!! A quick, cute, little Traveler's Notebook layout that came together so easy and looks awesome. Plus I have a whole bunch of beautiful floral embellishments to use on another layout!


Thank you so much for checking out my project! For more details and to see exactly how I created my embellishments, please visit my channel and see my process video. You can also use my discount code DTJENN at checkout to get your very own Floral Stamp Set and so much more :) Until next time, Happy Scrapping :)
Jenn


